The 8-year-old-I-hate-all-veggies-and-will-sit-at-the-dinner-table-all-night-long-in-defiance girl inside me is so rolling her eyes over the fact that I’m writing up a post about beets. And not just any beets, fermented beets! But she better learn to respect her elders because they know what time it is.
I can’t believe I ever had a time in my life where I picked every tiny onion out of my Ragu tomato sauce or actually gagged over a bite of broccoli. I mean, how did I not know that it could taste like this.
I’m thinking about the old me a lot these days because my second book, YumUniverse Pantry to Plate is coming out in a few weeks. Not only am I talking about where it all began, but I can’t help but stop and think about how veggies have truly changed my life inside and out.
When I’m developing recipes I’m always thinking about how I could make something that 8-year old girl would enjoy. How could I get her, or her cookie-loving grandmother, or her I’ll-eat-the-fat-you-cut-off-your-steak Dad to really LOVE meatless tacos. Or a cupcakes with beets in them!
I’m almost ashamed to say that I didn’t even try a beet until I was almost out of my 20s. What a waste of time, because I now will eat an entire bowl of them for dinner. This recipe here is just another way to enjoy them, all while getting some sweet probiotic and digestive benefits. Plus, it’s just the prettiest condiment you’ll end up keeping in the fridge.
If you’ve spent some time around here, you know I’m a bit bananas for fermented foods. My kitchen is like a lab—I do it to help my digestion, and I do it for the flavor. I’ve got yogurt, kefir water, tomaties, kimchi, sauerkraut, kombucha, cake, sourdough, Injera, kanji, even SCOBY candy and jerky for you fine people to experiment with. And now, gorgeous beets.
I add these to mixing-bowl salads, brown rice, wraps and tacos, and eat them up plain. And if you’re an egg-eater, try some with a fried egg. They are a great way to add probiotic kick, digestive power, a little crunch, and lots of flavor to any meal.
Tools:
Two 16 oz. wide-mouth canning jars (or a quart jar)
Mandoline slicer (optional)
Ingredients:
Use organic, home-grown, or farm-grown without pesticides or radiated treatment
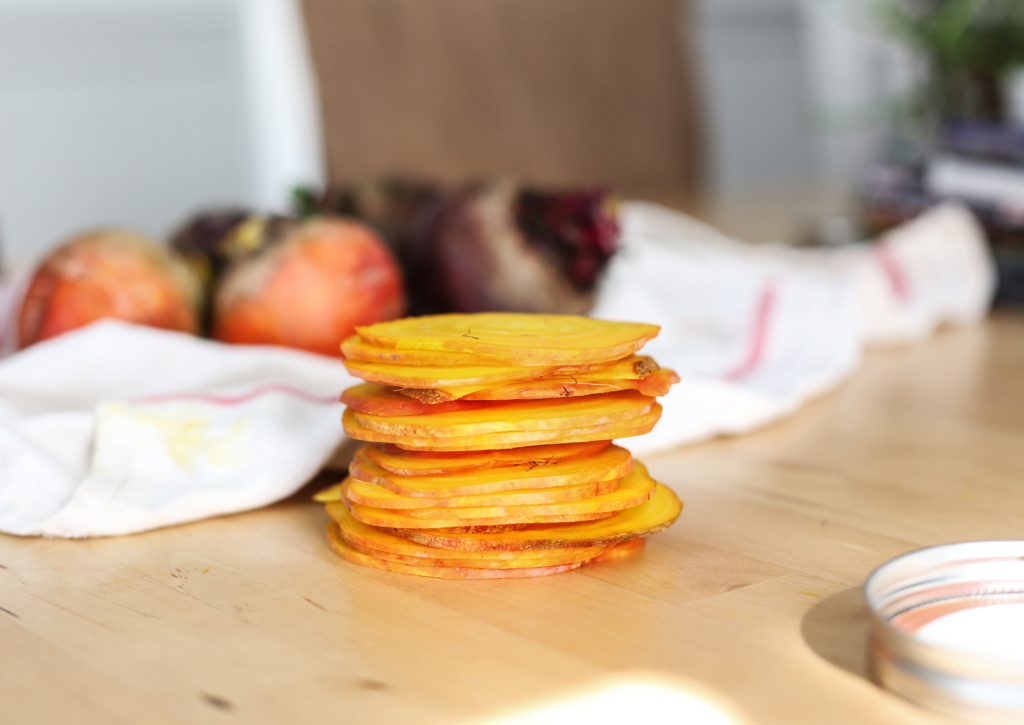
2–3 medium golden beets
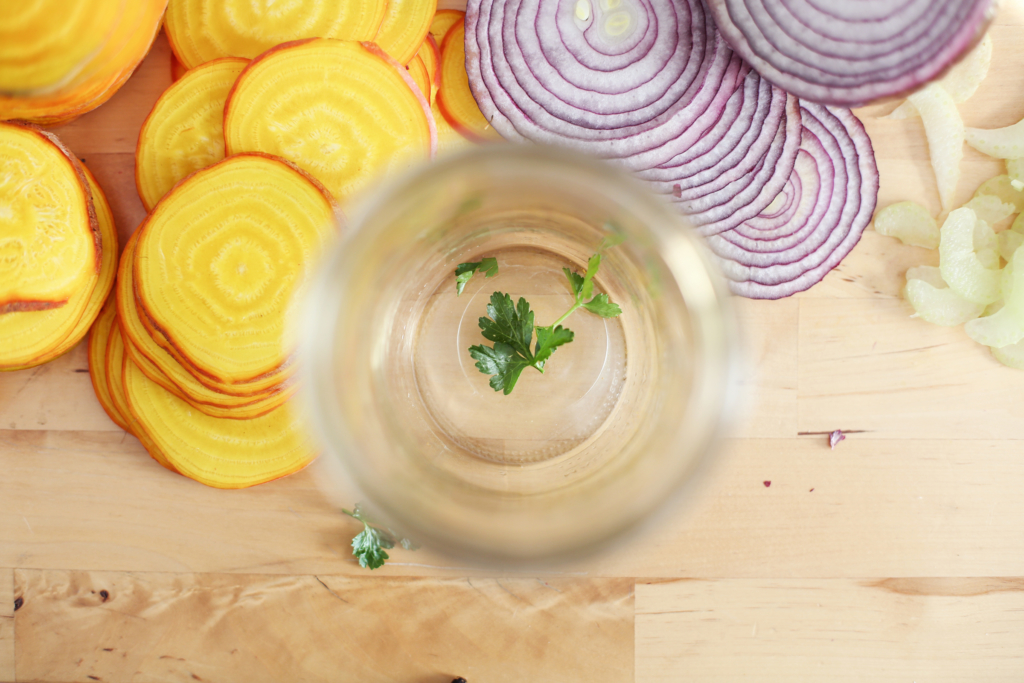
Half small red onion
1 large celery stalk
1/4 teaspoon fennel seed
Handful of fresh parsley leaves
—
1 teaspoon black peppercorn or
1/2 teaspoon whole black peppercorns and 1/2 teaspoon pink peppercorn
—
2 cups room-temperature water
2 tablespoons salt
Let’s get started.
Wash your beets, but keep the skins on—we want the microorganisms on them (they’re there) to help us ferment.
Make a brine: in a medium bowl, stir together water and salt until thoroughly dissolved. Set aside.

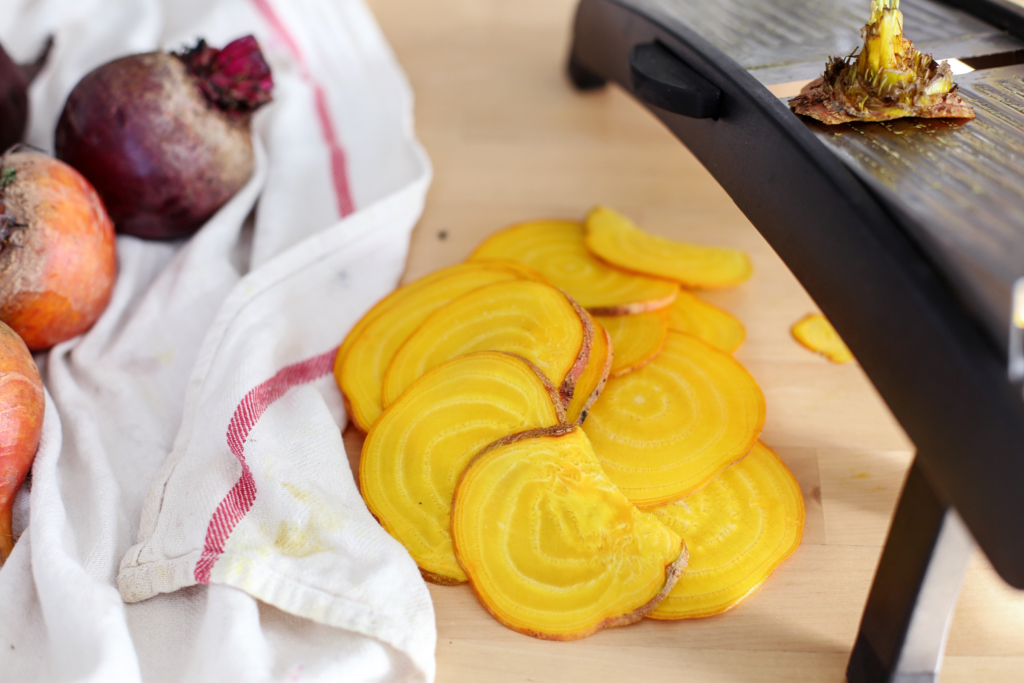
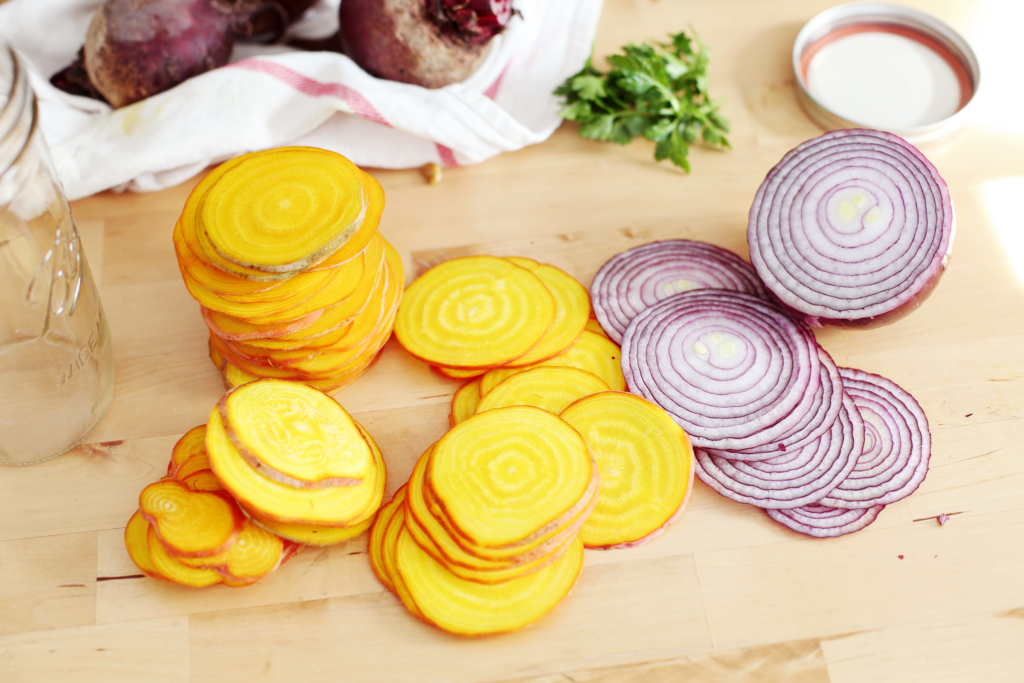
Using a mandoline slicer, or your best ninja-slicing skills, shave the beets into thin rounds.
Now do the same with a red onion…
… and celery.
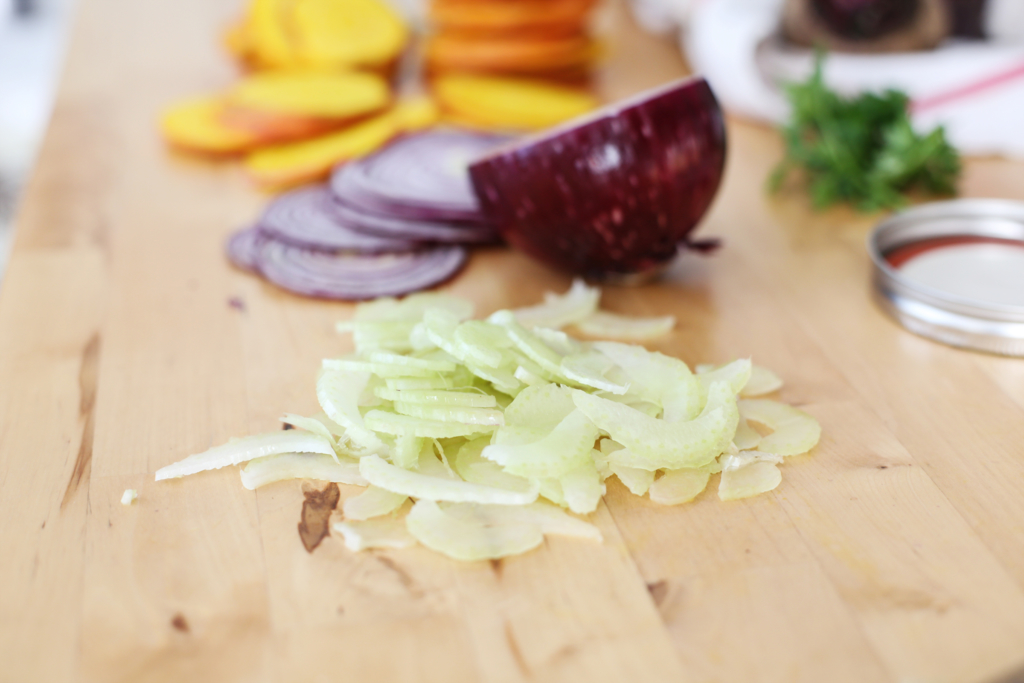
Admire the pretty simplicity. Almost look like pancakes (sorry 8-year-old me)…
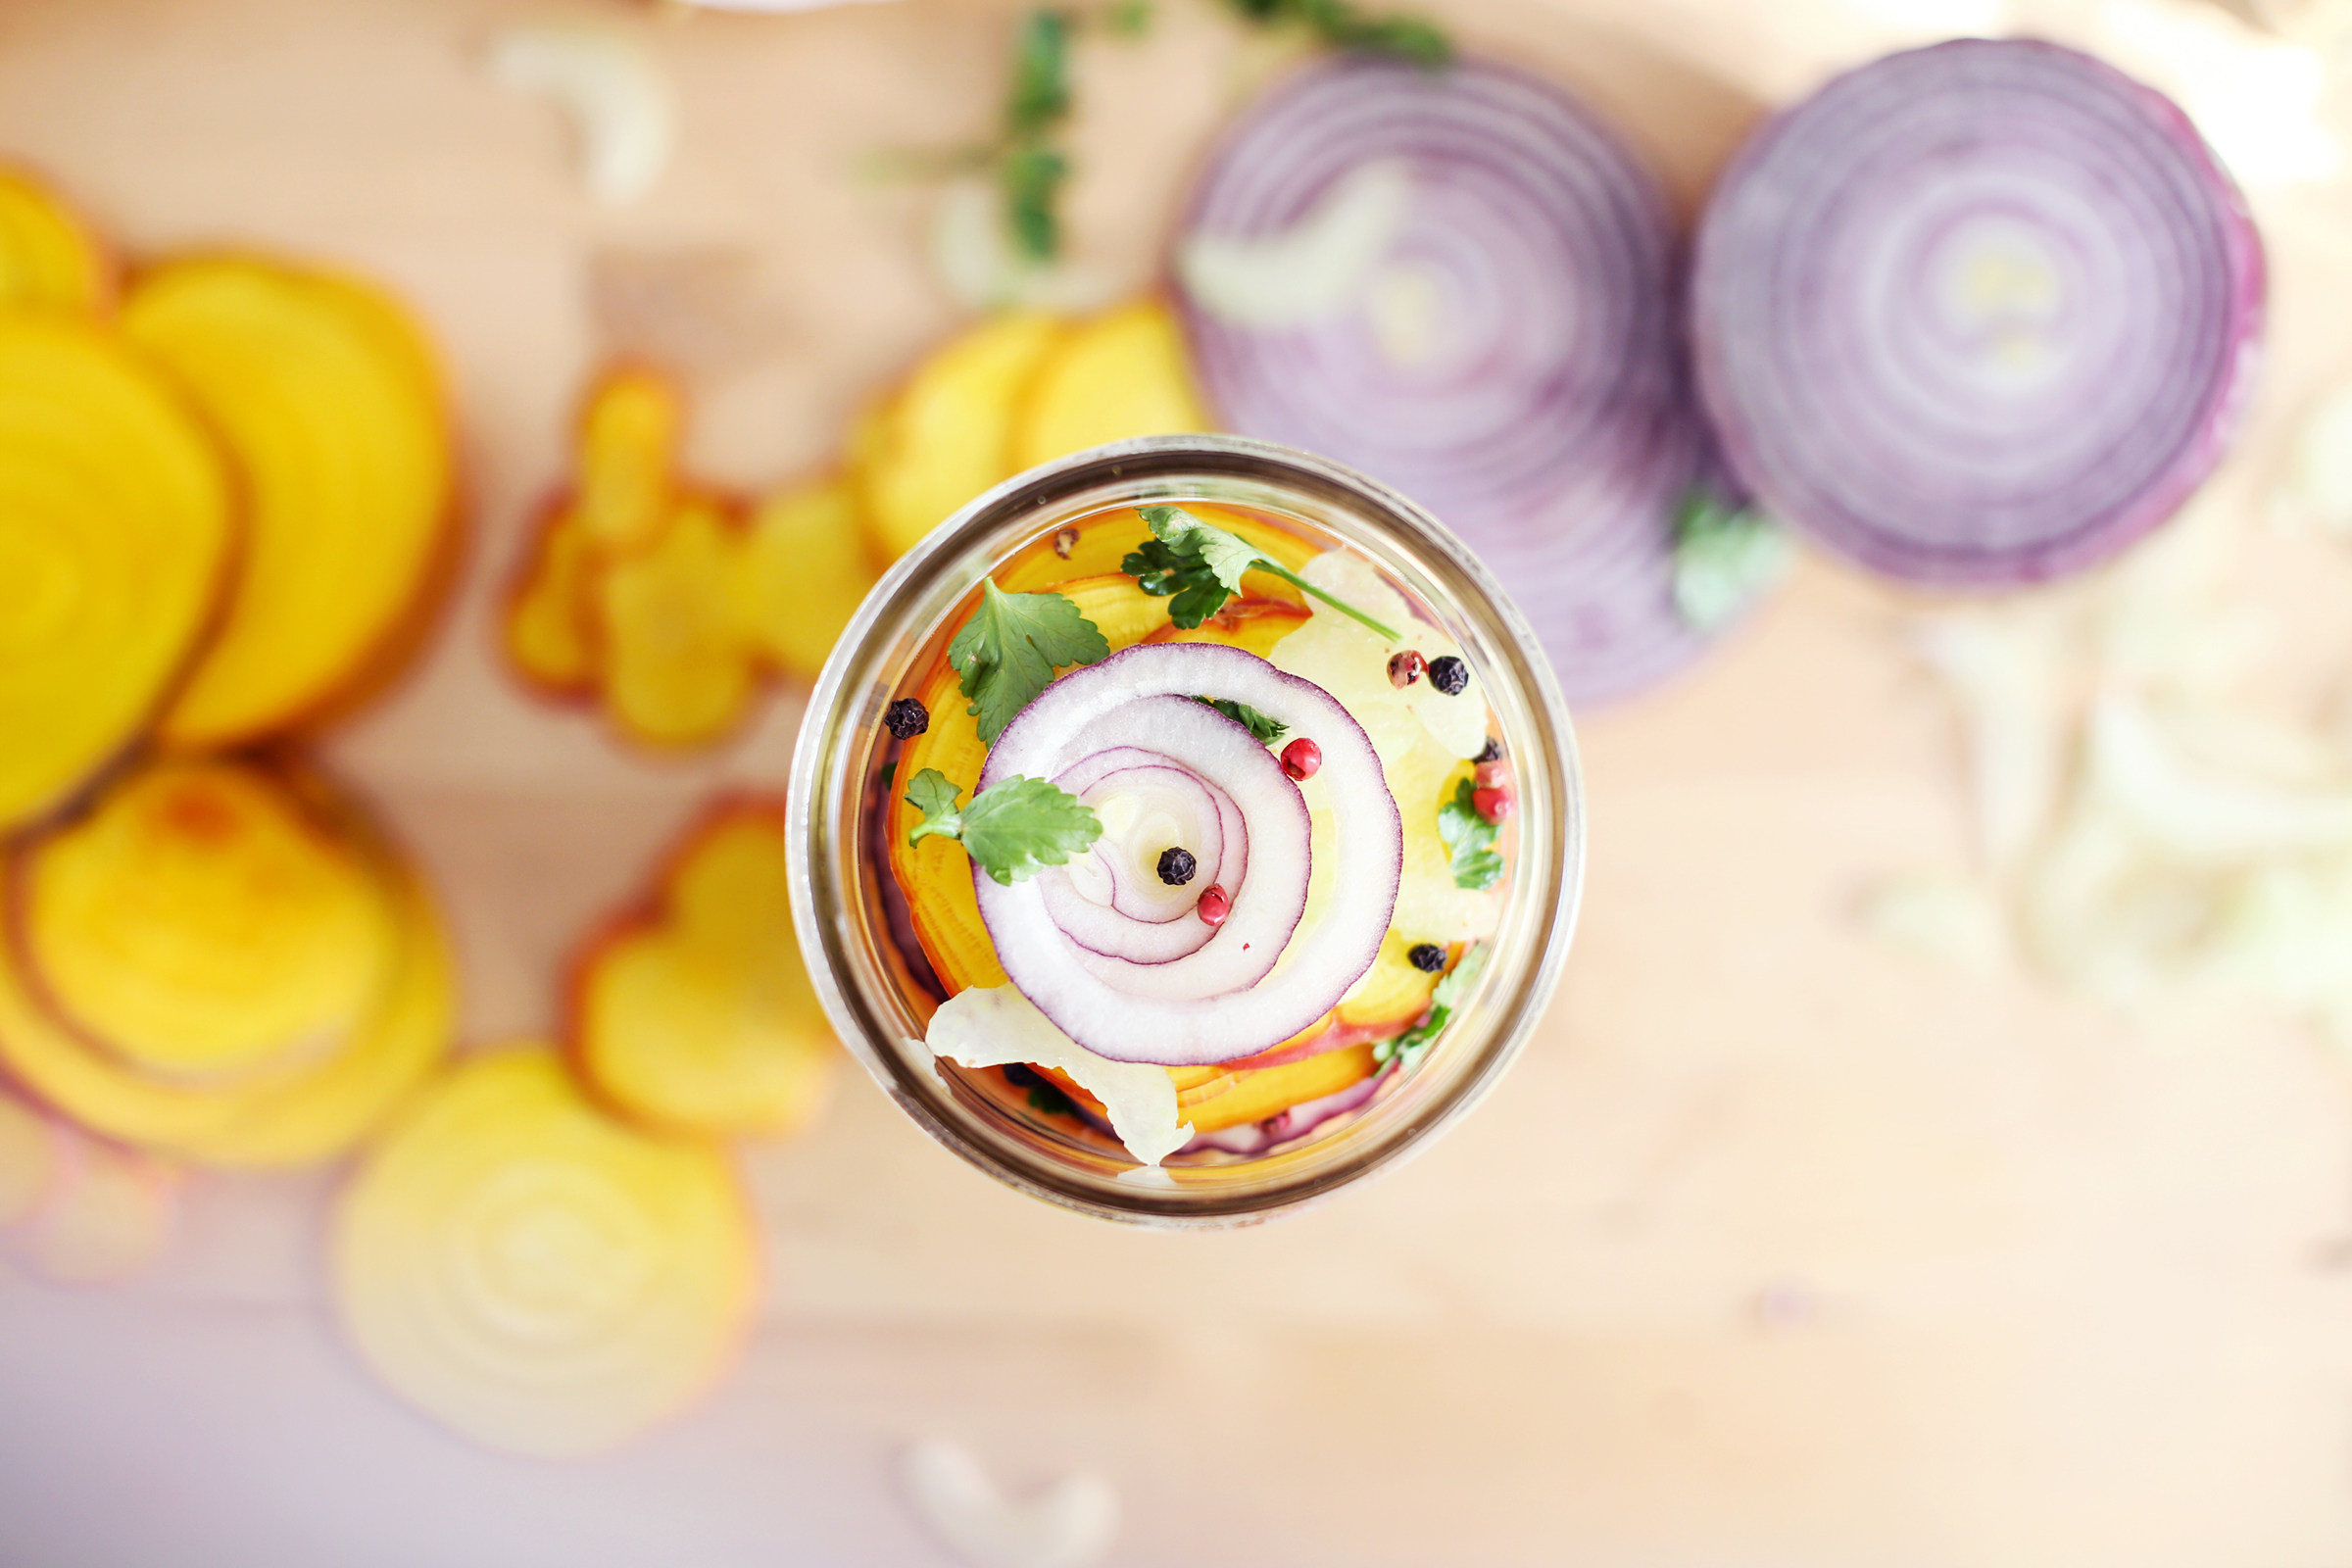
Now we layer! Drop some parsley leaves into the bottom of a jar.
Add some beet rounds, onion, celery a peppercorn or two, and a pinch of fennel seed.
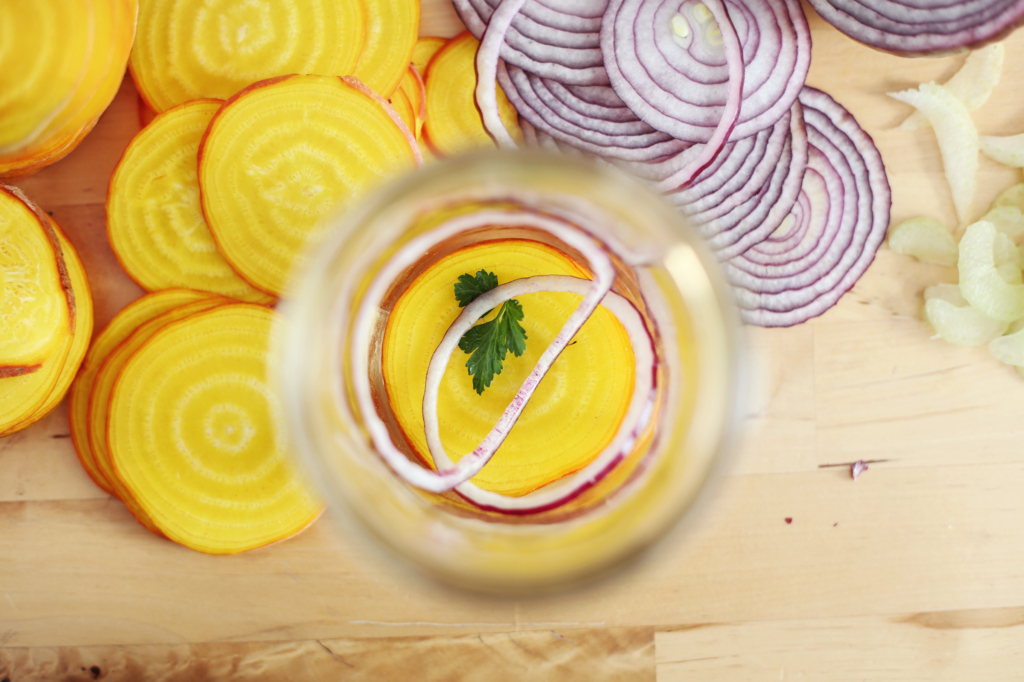
Repeat until the jar is filled with goodness.

Press the veggies down tightly and pour the brine over the vegetables until they are completely submerged. Press the veggies down again to release air bubbles.
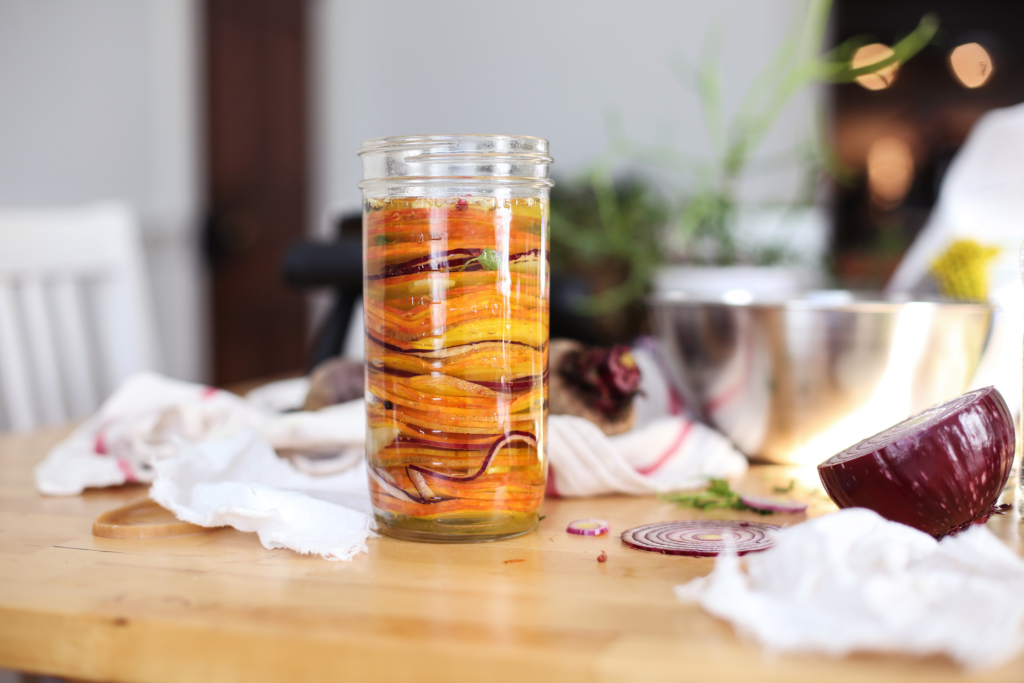
It‘s important to keep the veggies under the brine where they are safe from mold. The salty water is a mold deterrant—it’s why salt is used to cure meats and make cheeses. I have a few jar-sized rocks I found (that I washed and boiled) that I use as weights for fermenting. They help keep things nice and nestled under the brine.
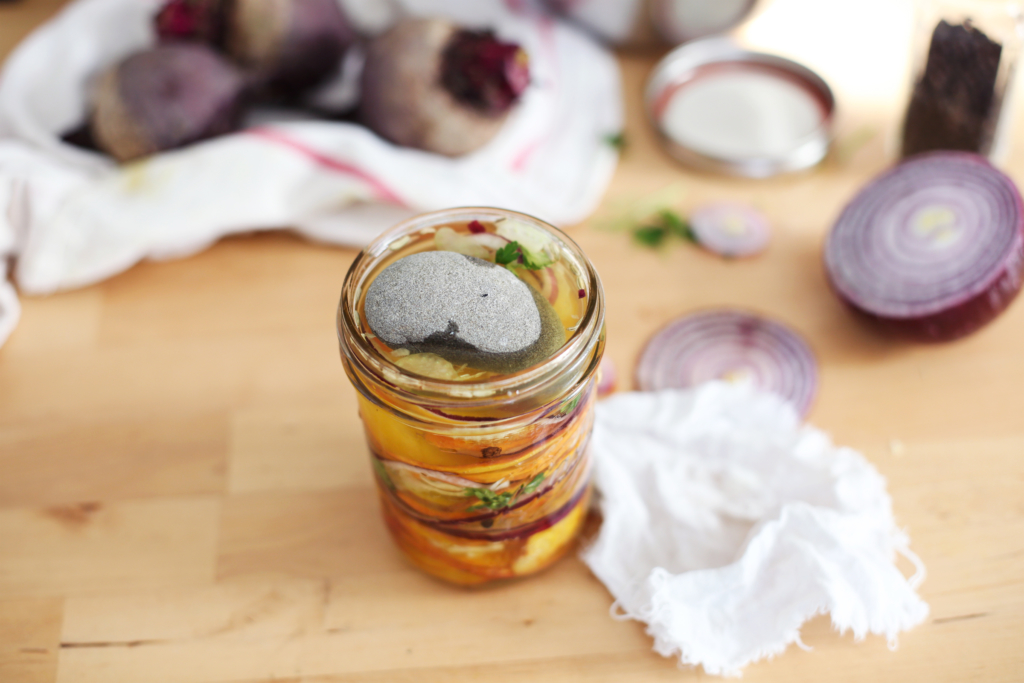
Once all veggies are under the brine, cover the jar with a cheesecloth and secure with a rubberband.
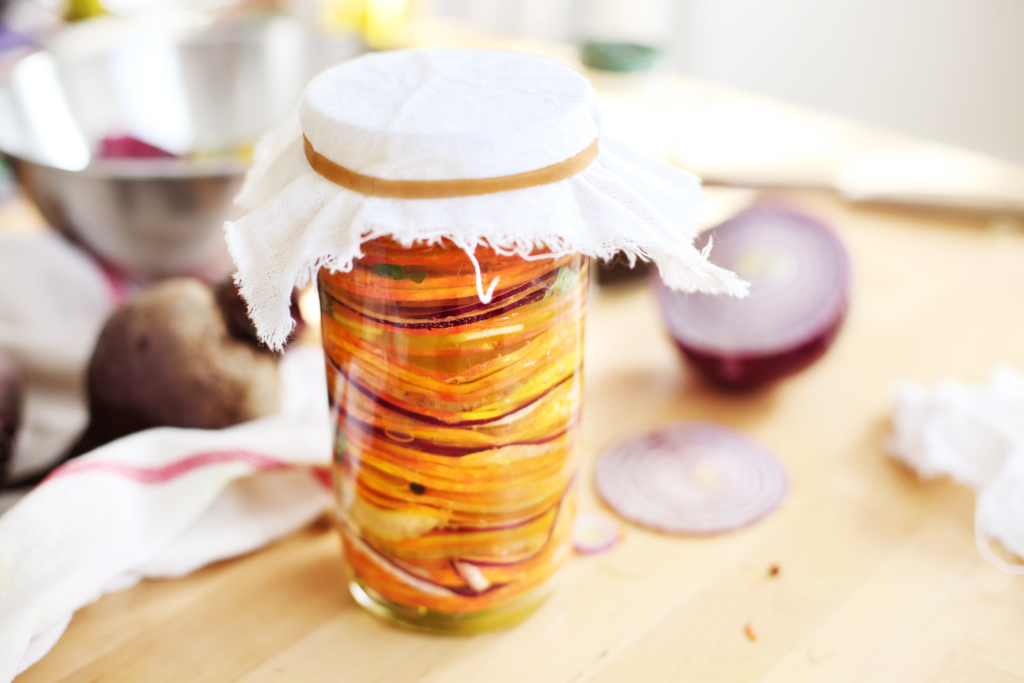
Allow the beets to ferment on the counter for 3–10 days. Make sure you check on them everyday—you want them UNDER the brine, so give the veggies a press to release any air each day. I like to ferment root veggies for a longer amount of time to soften them a bit. (https://www.nelsongreerpainting.com) But the best way to know what you like is to take out a round and eat it. If you want a more fermented, sour, rich flavor, ferment longer.
When they taste perfect to you, seal the jar with an air-tight lid and transfer to a cold pantry or fridge. Make sure you release air every few days—the veggies will continue to ferment in cold storage, but the temperature slows down our little beneficial bacteria friends quite a bit.
Now, I want to hear from YU. Do you ferment at home? Do you like fermented foods? What do you think of this recipe? Tell us with a comment below.
Visit us at our new home: Good Food Cooking School

Is there a reason you used golden beets instead of the purple ones? Just curious as I have lots of purple beets in my garden and I would love to try this recipe with them.
PS … I love your book … it is like a little food bible in my kitchen .. well a rather dirty bible with bits of food and juice from splashes and such!
Lori, you can absolutely use any beets you like for this recipe—I used golden because I had them 😉 I’m so happy you enjoy the book, and that it’s covered in splatters! That is exactly how it should be. X