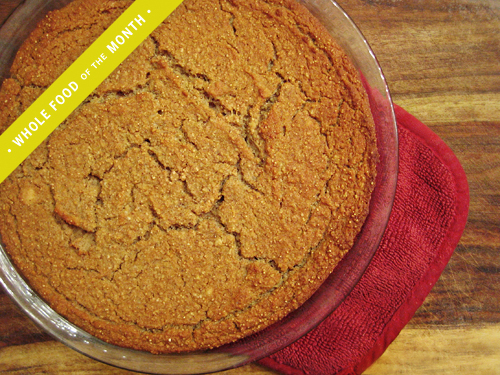
Rustic Blue Corn & Green Tomato Skillet Bread

The sense of community and generosity in my sweet little town just can’t be beat.

Sunflower_637

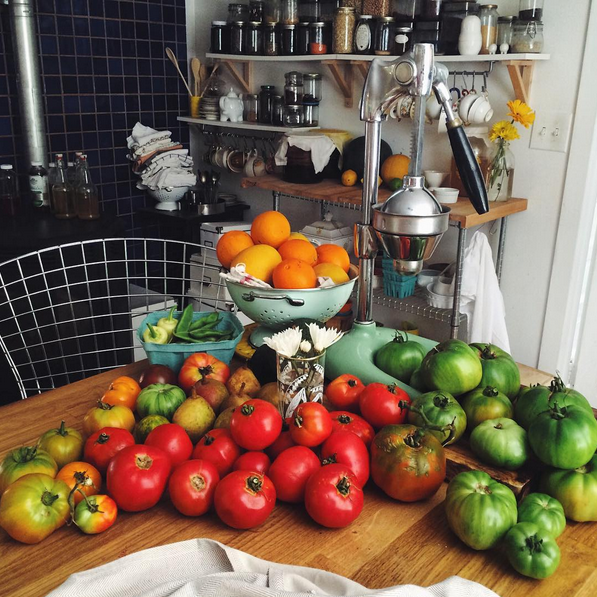
Every summer, my gardening pals and neighbors drop off bumper crop goodies like melon, peppers, onions, herbs, beans and of course, tomatoes. My kitchen island (and beyond) is completely covered with tomatoes of all sizes, and colors.

Screen Shot 2015-08-23 at 1.16.10 PM

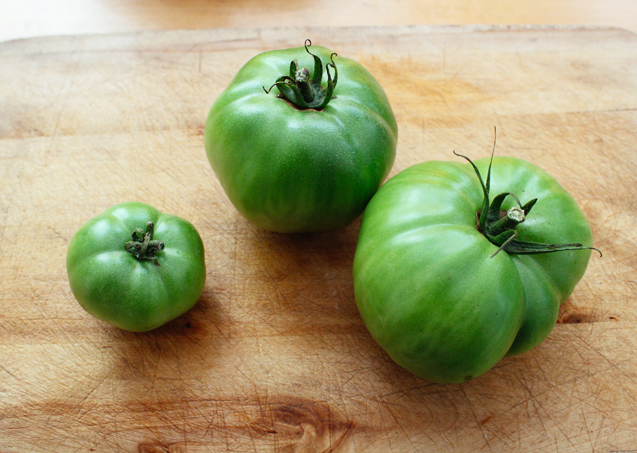
It’s inspired me to get creative and make sure each and every one of these beauties ends up in a delicious bite I can enjoy and share with my gifters as thanks. As some of you know, especially you Instagram friends‚ I’ve been working on a project that has to do with gluten-free, plant-based bread baking. I’m sooo close to sharing it with you, but in the meantime, since “bread” is where my brain is these days, I thought I’d get those green tomatoes in a quick Green Tomato Skillet Bread for you to enjoy while it’s high tomato season.
Green_Tomato_Skillet_Bread_maters

If you don’t have an oven-safe and/or cast iron skillet, you can use any muffin tin or high-heat baking pan you have for a skillet-style (low depth, not a loaf) quick bread. I also use two different sugars in this recipe for depth of flavor and moisture balance, but you can skip the honey if you like—just see the replacement suggestions below.

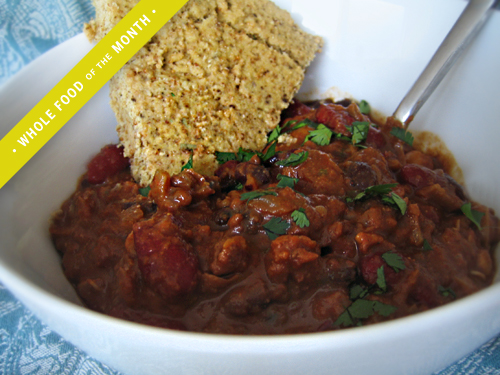
This bread makes a great breakfast slice, and it’s delicious served with my Multi-Bean Chili recipe and Black Bean Soup. Looking forward to hearing what you think of this recipe!

Tools:
Cast iron skillet*
Blender**
2 large glass bowls
Sieve or sifter
Silicone kitchen spatula or spoon

* You can always use a greased muffin tin, stoneware baking dish or any baking dish that can withstand high-heat baking.

**If you don’t have a blender you can use a bowl and some elbow grease to mix. The chia seeds will be whole in your bread versus blended—taste is the same.

Ingredients:
2 cups green tomatoes (about 3–4 large), seeded and diced

Dry:
1/4 cup sucanat (or coconut palm sugar) plus 1 tbsp for sautéing
1 1/4 cup non-GMO blue cornmeal (feel free to use yellow cornmeal if you like)
1/4 cup brown rice flour
1/2 cup sorghum flour
2 tbsp arrowroot flour
1/2 tsp aluminum-free baking soda
1/2 tsp aluminum-free baking powder
1 tsp fine ground sea salt

Wet:
3 tbsp coconut oil plus 1 tbsp for sautéing, 1–2 tsp for greasing skillet
2 tbsp wild-harvested honey (you can skip the honey and use 1/3 cup sucanat total in the dry ingredients instead, add 3 tbsp water to recipe if you don’t use honey)
2 tbsp fresh lime juice
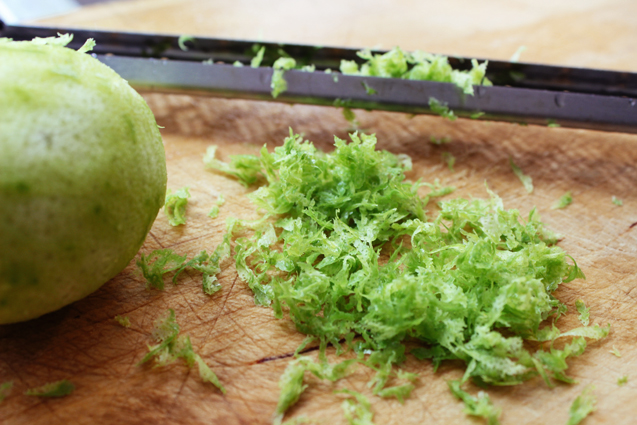
2 tsp fresh lime zest
3/4 cup warm water
2 tsp chia seeds

Let’s get started.
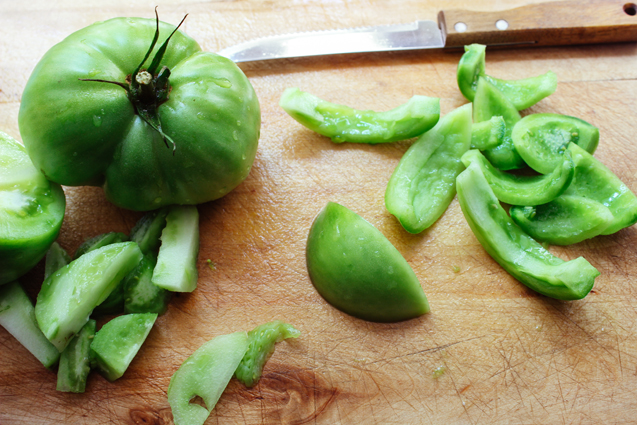
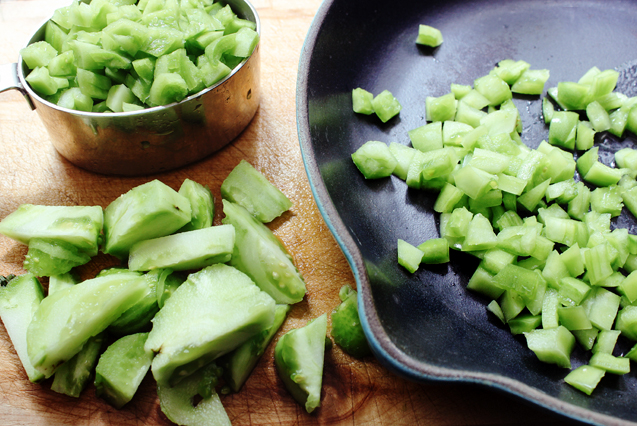
1. Preheat oven to 450°F. Prep tomatoes (seed and dice)…

Green_Tomato_Skillet_Bread_dice

… and zest. If you don’t have a zester, simply slice off the peel of the lime (do your best to avoid the bitter white pith) and mince.

Green_Tomato_Skillet_Bread_zest

2. In a skillet heated to medium-high, add diced/seeded tomatoes…
Green_Tomato_Skillet_Bread_chopped

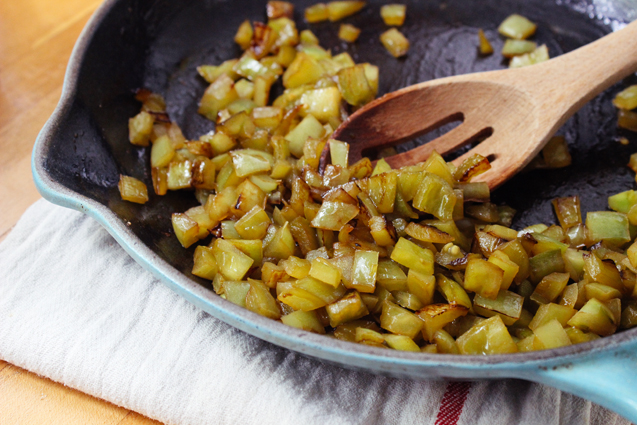
… 1 tbsp sucanat, 1 tbsp coconut oil and stir occasionally for 7–10 minutes, until tomatoes caramelize.
Green_Tomato_Skillet_Bread_Cooked

Remove from skillet and set aside. Add 1 tsp coconut oil to skillet and make sure all sides and bottom are coated—ready for baking. No need to wash, the goodness from caramelized tomatoes adds to the flavor of the bread.

3. In the blender, place all wet ingredients. Let sit for 3–5 minutes so chia can plumpen, then blend until smooth.

4. Sift together dry ingredients in a large bowl.

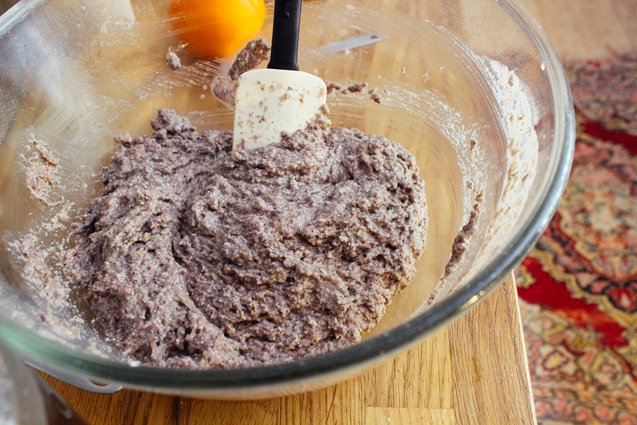
5. Mix together wet and dry ingredients…
Green_Tomato_Skillet_Bread_Mix2

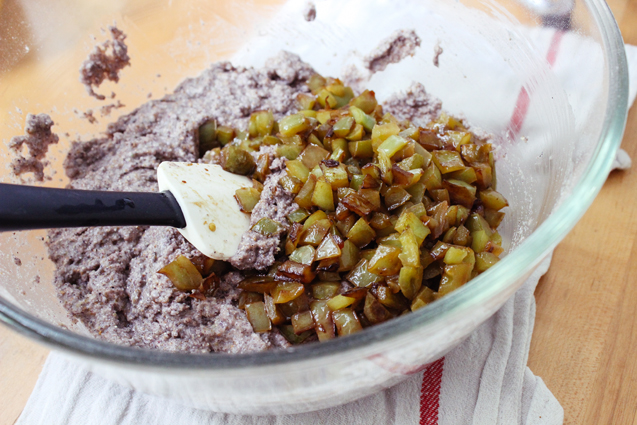
… and fold in caramelized tomatoes.

Green_Tomato_Skillet_Bread_Mix

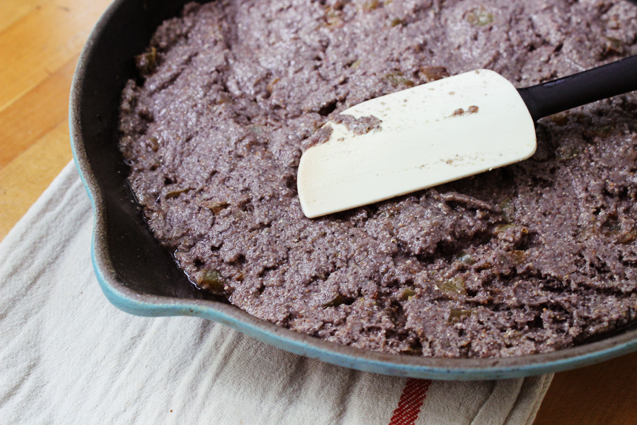
6. Transfer batter to skillet…

Green_Tomato_Skillet_Bread_spread

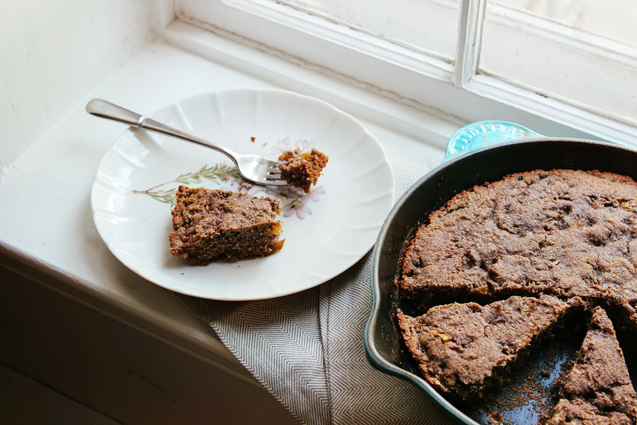
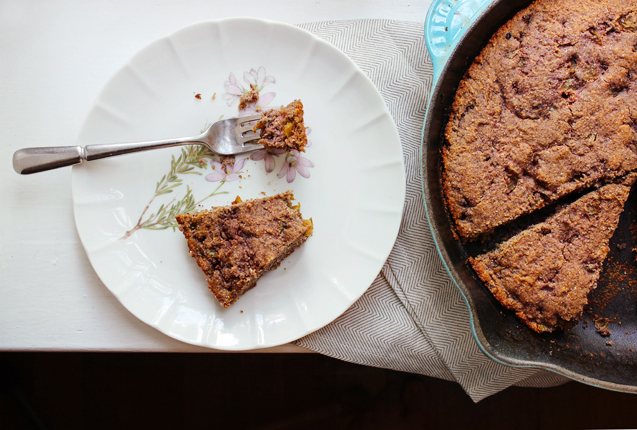
… and bake for 15 minutes. Allow to cool in pan and serve.

Green_Tomato_Skillet_Bread_main

Store in an airtight container in the fridge and reheat in the oven for 5 minutes if you like.

Try with:

Black Bean Soup

Black_Bean_Soup_Main

or my Multi-Bean Chili

Multi_Legume_Chili_Main

Tell me what you think of this recipe with a comment below!
Make Your Own Toxin-Free Dry Shampoo (For Dark and Light Hair)

A while back, Darling Magazine asked me to share my dry shampoo recipe with their readers. And this summer, every time I brush some into my hair I tell myself “you gotta share this with the YU community now—this stuff is a lifesaver.”

I’ve made two variations you can make for color—dark and light—and infinite variations as far as scent goes.

Hair dressers have always told me “you have fine hair, but a lot of it” and this fact has always had me chasing extra volume. So, the second I tried dry shampoo I was swooning. Not only did it remove any oil from my roots, but my hair’s texture was the stuff of dreams. Dry shampoo is a lifesaver for busy men and women, active folks, and people who prefer the way their hair looks a day (or three) after a shampoo.

It’s also great if you’re camping or road-tripping at all this summer—I used it plenty on my recent trip to Australia and New Zealand.

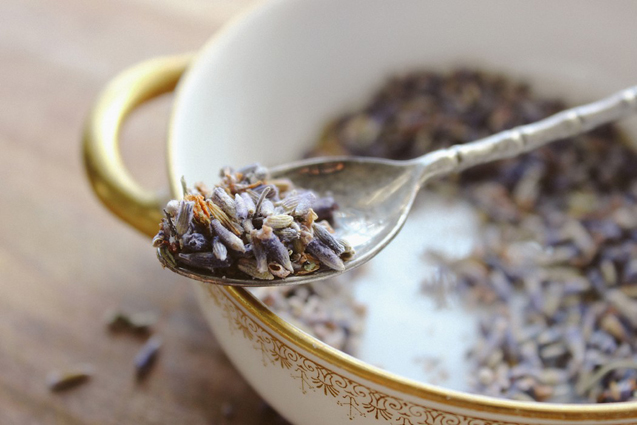
YU_Darling_Arrowroot_Lavender

If you aren’t familiar with dry shampoo, picture yourself running late to meet your pals for dinner post-workout and sans shower. With dry shampoo you not only dry out the oil and add thickening texture to your hair in minutes, but you save some water, too.

Our skin is our largest organ and what it comes in contact with (pollution, chemical cleaners, beauty products, fragrance) eventually makes its way into our bloodstream and can manifest as acne, aches and pains, mood swings, thyroid issues, developmental and reproductive harm, autoimmune disease and even in extreme cases, cancer. Most beauty and personal care products on the market, including dry shampoos (which are usually in aerosol cans), contain known carcinogens, endocrine disruptors and other toxins, so skip the chemical-laden dry shampoos and make your own out of a few ingredients so safe you can eat them. And they smell so good that you’ll want to.

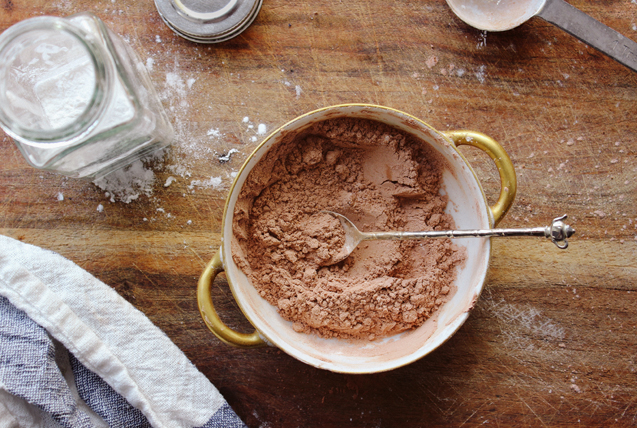
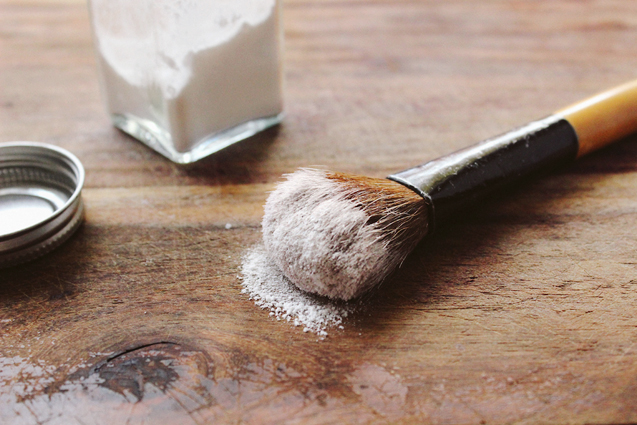
Making your own beauty products is easier than you may think. All you need to make your own dry shampoo is a container (an empty salt shaker, a recycled seasoning jar with a shaker top, a store-bought shaker, or a glass jar with a lid) and maybe a large makeup brush to apply (which I prefer over a shaker for more control). Feel free to double or triple amounts to fill the container you’ll be storing it in.

YU_Darling_Arrowroot_Brush

Get the recipes here for dark and light hair.

For extra drying and texture power (even though arrowroot is already super absorbent), you can add ½–1 tsp of white Kaolin clay to each formula. You can also use any essential oils you like to scent your shampoo.

Try these scent combinations:

  • Rosemary + Vanilla
  • Vetiver + Rose
  • Vanilla + Mint
  • Orange, Lemon + Vanilla
  • Rosemary, Cedar + Vetiver (a very handsome combination that works well for men)

To apply:
There are a few ways to apply dry shampoo. Try each to see what works best for you.

  1. Using a shaker, either put some shampoo into the palm of your hands, rub together and apply to oily parts of your hair close to the scalp, or tap shampoo directly into the parts that need some love. Pat down and use fingers to tousle and if necessary, use a brush or comb on hair until all the powder is absorbed.
  2. I like to use a makeup brush for application because it gives me great control. Just dip brush into powder, tap the extra off and dab the oily parts of your hair close to the scalp. Tousle, brush, and pat until hair is looking clean and oil-free.

Concerned about other chemicals that may be lurking in your beauty routine? Visit the Environmental Working Group’s Skin Care Database to see how your beauty products hold up when it comes to safety.

Have you tried dry shampoo? Tell me what you love about it with a comment below.


Creamy Chickpea & Wild Rice Soup

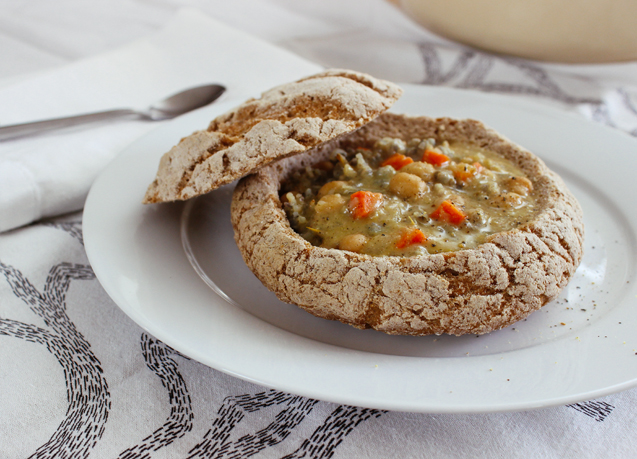
Years ago in Chicago, I used to frequent this great little carryout spot called the SoupBox. They served 12 homemade soups every day and one of my favorite orders was their Creamy Chicken & Wild Rice soup in a bread bowl. In a city where you’re wearing a scarf for at least 8 months out of the year, a place like the SoupBox was a girl’s best friend.

I’ve always wanted to create a “plantiful” version of that soup in all it’s hearty glory and I think I’ve done it. I’m also experimenting and perfecting some plant-based, gluten-free baking recipes to share with you, so you’ll see that I have an actual bread bowl to serve my soup in!

strip

If you are interested in the bread bowl recipe, check out the Gluten-Free Baking Academy’s Gluten-Free Bread Baking Course

Tools:
Large soup pot
Chef’s knife
Blender

Make about 14 servings of soup, so split the recipe if you want less, or freeze some for future dinners.

Ingredients:

Try to buy everything organic. Here’s why.

1 yellow onion, diced
1 stalk of celery, diced
1 cup carrot, diced
1 tbsp coconut oil
1 clove garlic, minced
2 tbsp fresh thyme
1 1/2 tsp fresh sage, chopped
1 bay leaf
12 cups veggie stock (make your own)
3 cups cooked chickpeas, start with 1 cup dry (how to soak and cook)
1 1/2 cups wild rice (short- or long-grain)
1/2 cup cashews, soaked
1/4 tsp liquid smoke (optional)
1 1/2 tsp fine-ground sea salt or more to taste (use applewood smoked for extra flavor)
1/2 tsp fresh-ground pepper to taste
1/2 small, fresh lemon

Let’s get started.
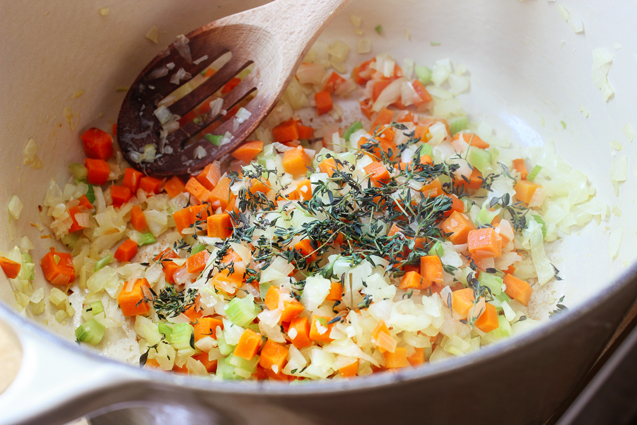
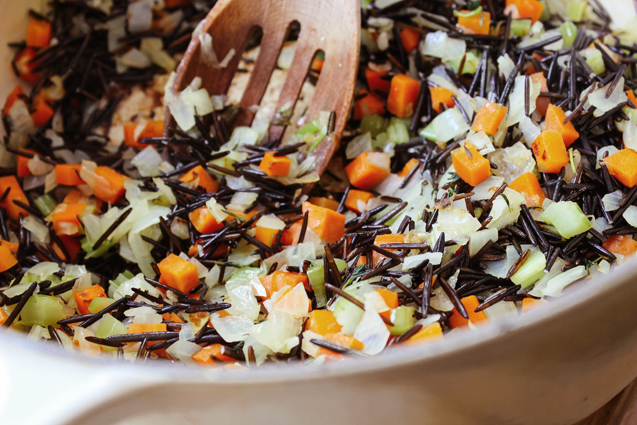
1. Place onion, celery and carrot in a large pot with coconut oil. Warm to medium-high and stir together for 10 minutes.

2. Add garlic, thyme, sage and bay leaf to pot with veggies and stir together for 3 minutes.

Sweat_veggies

3. Add veggie stock, chickpeas, and wild rice to pot. Bring to a boil, reduce heat and simmer for 20-30 minutes, until rice is tender.

Mix

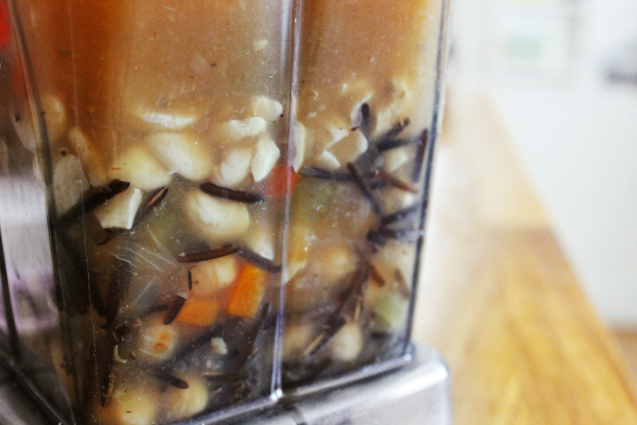
4. Using a ladle, scoop out 1 cup broth and transfer to the blender. Add one more scoop of soup to blender, with veggies and chickpeas (be sure the bay leaf isn’t in this scoop). Add cashews…

Pre_blend

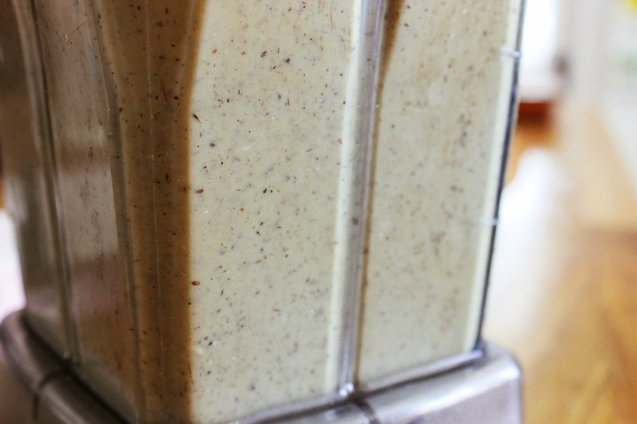
… and blend together until you get a nice, creamy purée.

Blended

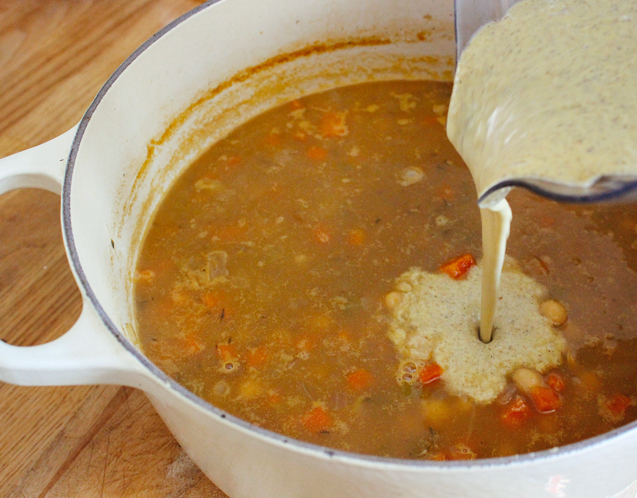
Add back into soup.

Add_Cream

5. Now, season with salt, pepper and liquid smoke if you like. Add a squeeze of fresh lemon juice, and serve warm.

Note: This soup gets better and better each day that the flavors can infuse together. It can be made up to 4 days in advance. Store in an airtight, glass container in the fridge for up to 10 days.

Now, I want to hear from YU. What do you think of this recipe? Tell us with a comment below.

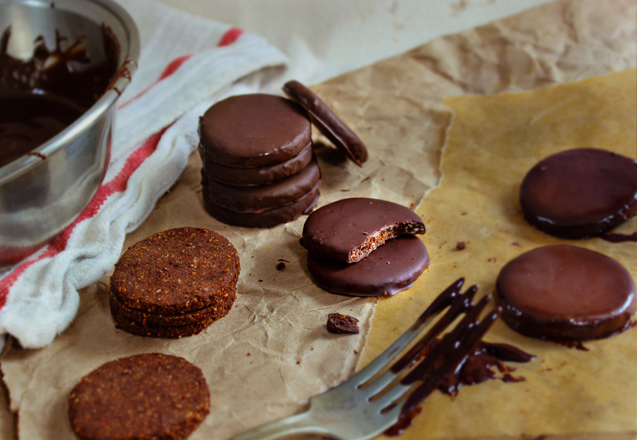
Gluten-Free, Dairy-Free Thin Mints

I’m having a lot of fun with the Vega #OneChange campaign. Last week I made some protein-packed Chai Oatmeal for those of YU who tend to skip breakfast, and this week, I’m sharing a fun, guilt-free recipe for YU Weekend Splurgers. Girl Scout cookie time is a few months away, but you can get your Thin Mint cookie fix here and now. That’s right. Gluten-free, vegan, nutrient-rich Thin Mint cookies simply made with Vega One Chocolate Nutritional Shake.

Vega #OneChange for The Weekend Splurger: Protein  Thin Mints YumUniverse: Loaded with Protein, vegan and gluten-free

Share this healthy #OneChange Thin Mint cookie recipe with your tweeps.

Makes:  approx 20 cookies

Tools:
Cookie sheet
Unbleached parchment paper
Large glass bowl
Spoon or silicone spatula
One 2″-2 1/2″ round cookie cutter
Double boiler
Rolling pin (or a sturdy, smooth glass)

Ingredients:
Try to buy everything organic. Here’s why.
Two 3 oz gluten-free, vegan chocolate bars (or 6-7 oz. of GF, vegan chocolate chips like these)
1/4 cup hazelnut flour (can substitute almond meal/flour)
2 tbsp brown rice flour
1/4 cup Vega One Chocolate Nutritional Shake
2 tbsp cocoa or raw cacao powder
2 tbsp water
1/4 cup + 2 tbsp sucanat
2 tbsp cold-pressed virgin coconut oil (warmed to liquid on the stove top if solid)
1/4 tsp fine ground sea salt
1 tsp vanilla extract
3/4 tsp peppermint extract

Let’s get started.
1. Preheat oven to 325°F and line a baking sheet with parchment.

2. Sprinkle hazelnut flour onto sheet and toast in oven for 5 minutes. This is an extra step you can skip, but it really adds lovely toasted hazelnut flavor.

3. Now, mix together all ingredients until a dough forms.

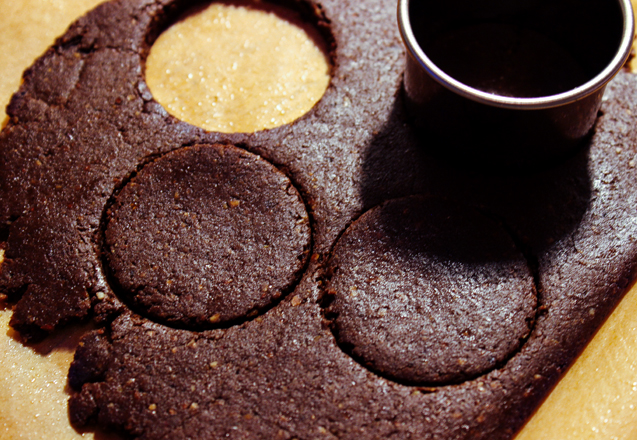
4. Take your parchment from the baking sheet and lay out on the counter. Pull a second piece of parchment. Place ball of dough on one sheet of parchment. Lay the other on top of dough and press with hands. Then roll out dough (the parchment keeps the dough from sticking to rolling pin—easier to roll out and easier to clean up) about 1/8″ thick.

5. Peel back top parchment and use cookie cutter to cut dough. Repeat until all dough is used and transfer cut cookies to a parchment-lined baking sheet (use one of your already cut sheets).

Vega #OneChange Protein  Thin Mints YumUniverse: Loaded with Protein, vegan and gluten-free

6. Bake cookies for 15 mins. Remove and allow to cool. I like to put my cookies in the freezer for about 10 minutes to expedite the chilling process and also to make the chocolate harden faster once I dip them. Less mess!

Vega #OneChange Protein  Thin Mints YumUniverse: Loaded with Protein, vegan and gluten-free


7. Get a double boiler going and melt your chocolate. No double boiler? Try this kitchen hack idea I write about in my Toasted Almond Bark post.

8. You can use the parchment sheet you baked on, but lay one out on the counter near the range. Using a fork, dip and flip your cookies in melted chocolate. Lift out with fork, tap a few times on the inside of the pot to shake off excess chocolate and lay on parchment to cool. Repeat until all cookies are dipped.

9. Chill/store in the fridge and enjoy. I know YU will.

Now, I want to hear from you. What is your favorite healthy weekend splurge? Tell me with a comment below…

How-Tos(day): Keep Herbs Fresh with These Storage and Usage Tips

Today, I want to answer a question sent in from community member Hoda.

Hoda writes…

Hi Heather,
I learned about YumUniverse from DailyCandy. I loved their Fridge Tour video with YU and all the tips you offered for keeping greens fresh. However, I was floored at the amount of herbs in your fridge drawer. WOW! How long do they last? And how do you keep them fresh?? I don’t buy that many fresh herbs, because they go bad before I can fully enjoy them. What’s your secret?!

– – –

This is a fun question, but first, hit the pause button in that DailyCandy video (watch vid above) when I open the drawer with herbs—there’s an awful lot of kale in that crisper, too. While I love fresh herbs, it’s not all herbs in my crisper drawer. I like to keep a small handful of a variety of herbs on hand in the kitchen—about the amount you’d get in a pack at the health food store or Farmers’ Market. And like kale, most of them keep longest in the crisper drawer.

To save money, make sure I’m always stocked up, and to insure that the herbs I’m using are clean and organic—I grow my own—bringing a handful at a time in from the garden.

Not not to worry though, if you don‘t have a garden, or access to a garden, you can easily grow herbs on a sunny windowsill in your home and pick what you need when you’re ready. This saves tons of money and makes it so much more convenient to prepare nutrient-rich meals from scratch. Just head to the Google or Pinterest and search for Windowsill Herb Garden and let the inspiration begin.

Storage:
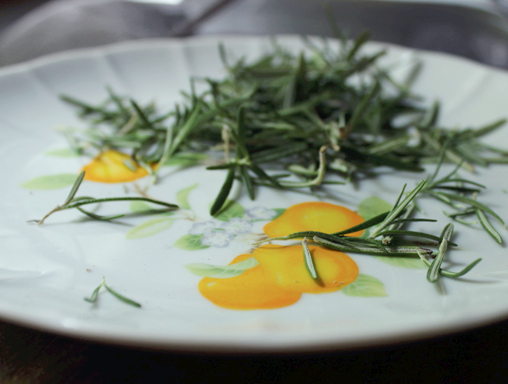
I do a variety of things to keep picked herbs fresh depending on what I’m cooking for the week. And sometimes, I’m surprised by how certain woody herbs like rosemary and thyme can last for three, even four weeks in the crisper drawer.

What’s fun about the answer to Hoda’s question, is that basil, dill, marjoram, parsley, cilantro, chives, thyme, rosemary and stems of sage can be stored like flowers. Just trim the stems off at the end when you get them home and place them in a glass with about 1” of water. Just enough to hydrate them, you don’t want soggy stems. They will keep on the counter for about 1-2 weeks. You can also store all herbs in water like this in the fridge, or without their little vase, in bundles in the crisper drawer (like you see in the Daily Candy video).

Basil goes bad the soonest in the fridge (in about 1 week)—it prefers room temperature, and I always have the best success growing it indoors (although I hear it can do quite well outdoors). If I have fresh picked basil on hand, I usually prepare recipes using the basil earlier in the week and save the heartier herbs like rosemary, sage and thyme for recipes later in the week.

When storing in the fridge, make sure the herbs can breathe, take them out of plastic bags and if they are in a little plastic box, make sure you leave it cracked open.

Contrary to what you may have heard, you don’t want to keep herbs trapped (or wrapped) in moisture, so only rinse them right before using in a recipe. And don’t pick the leaves off until you are ready to use them—with each cut you make to your herbs, you diminish their vitality.

If you think you’ve overbought/overpicked:
Use this as an opportunity to start experimenting by adding herbs to more recipes throughout the week and definitely use them in smoothies. Try a simple mixed greens smoothie with unique combinations like:

• Apples, pear or quince with rosemary

• Cilantro with pear or mango

• Thyme with strawberry, blackberry or blueberry

• Sage with honey and cherries or sage and apple

• Basil and strawberry go quite well together (oh yes, add a squeeze of lime)

You can place herbs like rosemary and thyme in a pot with lemon and vanilla bean and some water. Simmer for a chemical-free potpourri—the fragrance will fill the house.

And if you just didn’t get to use your herbs in time—hey busy happens to us all—and a few leaves in your bundles are starting to turn brown/black, pick off the fresh leaves and place them on a dry plate in a cool, dark part of the kitchen for a few days—they will dry out. You can then save them in an airtight glass jar and use them up next week or next month—and you can feel good knowing that A.) you dried them yourself, and B.) you didn’t waste them.

Dry them

Create dry seasonings mixes like rosemary, thyme and sage—store them in your pantry, or gift them to lucky recipients.

You can use them for teas, not just for flavor, but for healing and balancing.

The medicinal qualities of culinary herbs are awesome.

• Rosemary: antidepressant, soothes nerves, boosts memory

• Thyme: soothes menstrual cramping, laryngitis, combats tooth decay

• Sage: calms anxiety, lowers blood sugar, reduces perspiration

• Mint: relieves indigestion, heals the liver, improves blood circulation

• Basil: fever reducer, kidney booster, headache remedy

• Dill: heals the digestive tract, alleviates insomnia, allergy relief

This is just the tip of the iceberg, but you can’t go wrong.

And when all else fails (busy people listen up):
You can grab an ice cube tray and fill each compartment with 1-2 tsp of roughly chopped herbs or herb combos and then fill the trays up with unrefined, virgin coconut oil that has been gently warmed to liquid on the stovetop (no microwave). Pop in the freezer for about 20 minutes, and once frozen, transfer these ready to use oil/herb cubes to an airtight glass container and store in the fridge. You only use the freezer to harden your cubes and then store in the fridge once solid to avoid possible freezer burn. They keep in the fridge for almost ever.

Herb cubes

This is a great way to make quick nutrient-rich dinners by jazzing up chickpeas, quinoa and/or buckwheat tossed with veggies. Just chop up the veg you have around, mix with some cooked legumes or quinoa or buckwheat, add your herb cubes and a one pot dinner is ready in 10-20 minutes.

Oh, one more tip for YU:
Save herbs, stems from herbs, and even use “wiltier” herbs for homemade veggie stock—just put them in the freezer until you have enough scraps to cook up with veggie scraps for some homemade stock.

Veggie Stock

Once your stock is prepared, you can also freeze into cubes for smaller portions like the oil cubes (but those stay in the freezer once solid).

And remember—it’s nature—real food is supposed to decompose, so the compost bin is another great place to put herbs that didn’t quite make it. At least they will go back into the earth to grow more food.


The Ultimate Plant-Powerful Dairy-Free Milk Guide

There truly are infinite possibilities when it comes to a plant-based diet and milk is no exception. While there are more and more pre-packaged options hitting grocery store shelves these days for non-dairy milks, nothing tastes as delicious, offers as much variety, or packs the additive/preservative-free, nutrient punch that homemade does. I have been pulling this post together for YU for a while now, and I hope that it inspires some fun and experimentation.

I’ve also included suggestions for what to do with leftover pulp and ideas for how to fancy up your milks… Continue reading “The Ultimate Plant-Powerful Dairy-Free Milk Guide”

Sweet Potato & Kale Fusilli

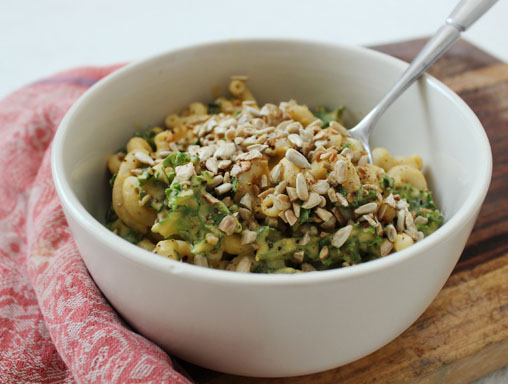
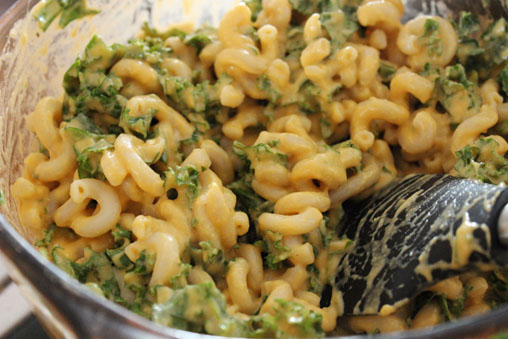
Here’s another fun way to make a nutritious, gluten-free, dairy-free version of mac and cheese—with curly fusilli noodles and sweet potatoes (yes, sweet potatoes) as the “cheese” sauce. It’s a new favorite at my house.

Serves 2-4

Tools:
Steamer with lid
Chef’s knife
Large pot
Small skillet
Large glass bowl
Strainer 

Ingredients:
Try to buy everything organic. Here’s why.
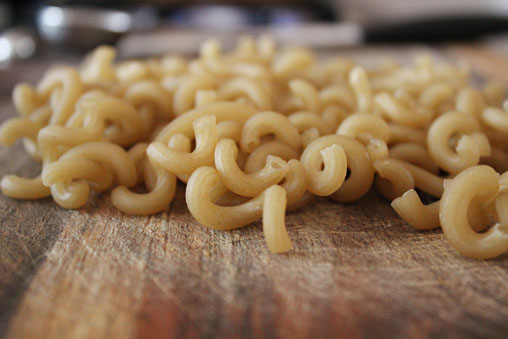
2 cups gluten-free fusilli (or macaroni, spirals, whatever YU like)
2-3 large leaves of kale, stems removed and chopped
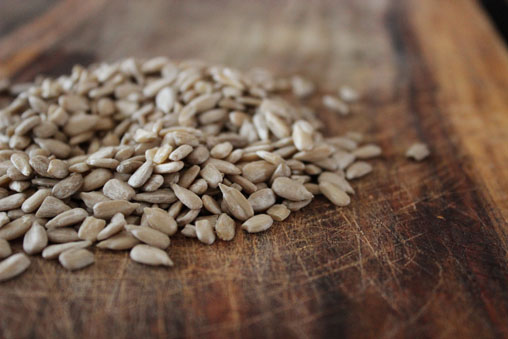
1/4 cup sunflower seeds, unsoaked

Sauce
2 cups diced sweet potato, steamed
1 tbsp nutritional yeast
1 clove garlic
1 tbsp coconut oil
1 tsp fresh lemon juice
1 tsp fine ground sea salt
2 tbsp cashews, soaked for 2 hours
2 tbsp sunflower seeds, soaked for 4 hours
1/2 cup pure water
Fresh ground pepper to taste

Let’s get started.
Dice your sweet potato and steam for 20 minutes, or until easily pierced with a fork.

While steaming, prepare fusilli according to manufacturer’s instructions.

While everything is cookin’, toast your unsoaked sunflower seeds in a dry skillet heated to medium-high, for about 5 minutes. Sprinkle in a pinch of sea salt.

Once browned a bit, remove from heat and give them a rough chop.

Place steamed sweet potato and all sauce ingredients in the blender. Mix until ultra smooth.

Once fusilli is cooked, rinse well and transfer to a large glass bowl. Fold kale and sauce into noodles and mix well.

Serve warm in a bowl (reheat on the stovetop if need be) and top with your toasted sunflower seeds and some fresh cracked pepper.

Enjoy!

Now, I want to hear from YU. Have you tried this recipe yet? Tell us with a comment below.

Gluten-Free & Naturally Dyed Holiday Shortbread Cookies

Colorful cookies are just part of the holidays, and for folks who want to steer clear of the dangers of artificial dyes, this Gluten-Free & Naturally Dyed Holiday Shortbread Cookie recipe is for YU. I use cocoa powder for brown, liquid chlorophyll for green and fresh beet juice for red. You can prepare these cookies either with organic powdered sugar (brightest color) or with a less processed alternative, sucanat (more rustic looking).

I will be honest, if you are new to baking, you may want to try simpler recipes like Toasted Pumpkin Seed Florentines, Ginger Molasses CookiesChocolate Chunk Puddle Cookies or Oatmeal Chocolate Chip Cookies for the holidays. If you have a lot of patience and baking experience, try these shortbread cookies—you can play around with making swirly styles, or you can keep it simple and use cute cookie cutters. I show you how to do it all after the jump… Continue reading “Gluten-Free & Naturally Dyed Holiday Shortbread Cookies”

Black Bean Soup with Sunflower Seed Cashew Cream

I’m on a soup kick lately, mainly because they are so easy—and a great way to get a ton of veggies together in one simple meal. I’ll be honest, most weeks, I don’t have a master plan about what I am going to eat. But I do I reach into the pantry on Sunday night and start soaking some buckwheat, quinoa, lentils, chickpeas and beans. On Monday, I cook everything up (setting aside half of the lentils to make sprouts). When everything is cooked, I toss them into a glass container in the fridge. If you have these staples cooked and ready in the fridge, it makes meal prep that much easier for you all week long.

It’s starting to get cold here in Chicago and one night after a particularly bone-chilling walk from yoga to the car, I decided—I want soup when I get home. Black beans were ready for me in the fridge, so I got to work. In no time, soup was on.   Continue reading “Black Bean Soup with Sunflower Seed Cashew Cream”

Gluten-Free Dairy-Free Popped Amaranth Bread

This post is dedicated to my cousin Richard, who has been kindly begging me for this recipe since he tried it a few weeks ago. This gluten-free, dairy-free bread goes perfectly well with Hearty Multi-Bean & Chia Seed Chili—I almost never make one recipe without the other and you can even bake the two together to create a casserole (see below). Amaranth is a nutritional powerhouse—high in lysine, calcium, protein, fiber and has a nutty, almost malty flavor. Popping the amaranth is fun and really adds a subtle popcorn-like taste to this unique, earthy bread which can be prepared in a pie pan, mini muffin tins, as drop biscuits or as regular-sized muffins. Versatile and delish. Continue reading “Gluten-Free Dairy-Free Popped Amaranth Bread”